반응형

from dateutil import tz

from datetime import datetime


utc_zone = tz.gettz('UTC')

seoul_zone = tz.gettz('Asia/Seoul')


utc = datetime.now()

current_time = utc.replace(tzinfo=utc_zone).astimezone(seoul_zone)


포맷형식 바꾸기 

nowstr = current_time.strftime('%Y-%m-%d %H:%M:%S')


taeoh.tistory.com/60


python utc시간 변경

python 실행 중인 컴퓨터 시간형식이 현재시간과 다른경우가 왕왕 있다. 그럴때(시스템 시간을 바꾸지 못하는 경우) 아래 코드로 강제 변환해주면 된다. from datetime import datetime from dateutil import tz..

taeoh.tistory.com


반응형

'Deep learning > 소스' 카테고리의 다른 글

yolov5 coco data set training  (0) 2021.09.17
classification mnist-LeNet-5  (0) 2021.04.03
yolov5 모델pt  (0) 2021.03.26
classification model code  (0) 2021.01.14
20201110-yolov5로 데이터 학습  (2) 2020.11.04
반응형

장고에서 cuda out of memory 가 날 경우 가 있다. 

일단 원인을 찾아야 한다.

어떤 문제 때문에 cuda out of memory가 됬는지를 먼저 파악해야 하기 때문에 로그를 먼저 확인해야 한다.


로그를 확인하면서 어디에서 메모리를 많이 사용하는지 확인이 필요하다.


그중의 한가지 원인 은 :

tensorflow 모델을 사용할 경우:

tensorflow 모델을 사용할 경우에는 gpu메모리를 먼저 할당하여 사용하기 때문에 

tensorflow 모델을 사용할 경우에는 cpu 모드로 한다음 pytorch 모델을 사용할 경우에는 gpu 모델로 바꾸면 된다.


반응형
반응형

이미지가 깨져서  나오지 않을 경우가 많다.

이 경우에는 우선 파일 저장 경로를 확인한다.


	private static final String SAVE_PATH = "C:\\dev1\\file";
	private static final String PREFIX_URL = "/upload/";


저장 경로와 가상 경로를 두가지 경로로 지정한다.


SAVE_PATH는 실제 저장 경로이다.

실제 저장 경로로 이미지를 호출 할 수 없기 때문에 가상 경로를 지정한다.


TOMCAT -> SERVER.XML 설정해준다.

<Host appBase="webapps" autoDeploy="true" name="localhost" unpackWARs="true">
      	<Context path="/upload" docBase ="C:\dev1\file\"  reloadable="true"></Context> 

HOST 바로 밑에 설정해주시고 


화면은 아래와 같이 지정한다.

<%@ page language="java" contentType="text/html; charset=EUC-KR" pageEncoding="EUC-KR"%>

<!DOCTYPE html>
<html>
<head>
<meta charset="EUC-KR">
<title>Insert title here</title>
</head>
<body>
${imgUrl}
<img alt="logo" src="${imgUrl}" width="300" height="300"/>

</body>
</html>


결과 출력

반응형
반응형


spring에서 파일 upload하는 경우에 Required request part 'file' is not present 이런 에러가 난다.


소스상에서는 문제가 없는듯 하다.


    <bean id="multipartResolver" class="org.springframework.web.multipart.commons.CommonsMultipartResolver">
        <property name="maxUploadSize" value="100000000" />
        <property name="maxInMemorySize" value="100000000" />
    </bean>

이 부분을 아래 와 같이 수정하였다.

	<bean id="multipartResolver" class="org.springframework.web.multipart.support.StandardServletMultipartResolver">
	</bean>


CommonsMultipartResolver를 StandardServletMultipartResolver로 변경하니 정상적으로 업로드가 된다.


출처: https://java.ihoney.pe.kr/351 [허니몬(Honeymon)의 자바guru]


반응형
반응형

spring 설정 파일 성정할 경우에

이 폴더 하위에 정확히 index.jsp가 있는데도 불구하고 아래와 같은 오류가 나서 화면 이동에서 오류가 난다.


14:46:42.384 [http-nio-8081-exec-1] DEBUG o.s.web.servlet.view.JstlView - View name 'index', model {message=123456}
14:46:42.400 [http-nio-8081-exec-1] DEBUG o.s.web.servlet.view.JstlView - Forwarding to [/WEB-INF/views/index.jsp]
14:46:42.406 [http-nio-8081-exec-1] DEBUG o.s.web.servlet.DispatcherServlet - "FORWARD" dispatch for GET "/WEB-INF/views/index.jsp", parameters={}
14:46:42.411 [http-nio-8081-exec-1] WARN o.s.web.servlet.PageNotFound - No mapping for GET /WEB-INF/views/index.jsp
14:46:42.411 [http-nio-8081-exec-1] DEBUG o.s.web.servlet.DispatcherServlet - Exiting from "FORWARD" dispatch, status 404
14:46:42.412 [http-nio-8081-exec-1] DEBUG o.s.web.servlet.DispatcherServlet - Completed 404 NOT_FOUND


여러가지를 확인했는데 문제는 dispatcher 할 경우에 url-pattern이 틀렸기 때문이다.

url -pattern을 수정하면 정상적으로 화면 이동이 된다.


수정 전

    <servlet-mapping>
        <servlet-name>dispatcher</servlet-name> <!-- dispatcher-servlet.xml을 찾는다 -->
        <url-pattern>/*</url-pattern>
    </servlet-mapping>

수정 후 

    <servlet-mapping>
        <servlet-name>dispatcher</servlet-name> <!-- dispatcher-servlet.xml을 찾는다 -->
        <url-pattern>/</url-pattern>
    </servlet-mapping>
반응형
반응형

동영상 참조하여 정리 


데이터 다운

public.roboflow.com/ 


Computer Vision Datasets

Download free, open source datasets for computer vision machine learning models in a variety of formats.

public.roboflow.com

필요한 패키지 설치하기


runtime 유형 변경

하드웨어 가속기를 gpu로 사용한다.

label 이 x , y , width , height 로 지정되여있다.

classs ,x,y , width , height


yolov5 모델 불러오기

yolov4 를 github에서 받는다.

%cd /content
!git clone https://github.com/ultralytics/yolov5.git

yolov5 디렉토리로 이동한다

%cd /content/yolov5/


필요한 패키지 설치하기

!pip install -U -r requirements.txt

yaml 확인하기

%cat dataset/dataset40.yaml


포함 하고 있는것은

train 경로 

val경로

nc : class종류

mame : class 이름


경로가 잘못 될 경우 수정해야 하고 train val 나누기


데이터 모으기

from glob import glob

img_list = glob("/content/yolov5/dataSet/*/*.jpg")
print(len(img_list))


train validation set으로 나누기 

from sklearn.model_selection import train_test_split

train_img_list, val_img_list = train_test_split(img_list, test_size = 0.1, random_state=2000)
print(len(train_img_list), len(val_img_list))

train image랑 validation 이미지 경로 를  txt 파일로 저장하기 

with open("/content/yolov5/dataset/val.txt", "w") as f:
    f.write('\n'.join(train_img_list) + '\n')

with open("/content/yolov5/dataset/train.txt", "w") as f:
    f.write('\n'.join(val_img_list) + '\n')
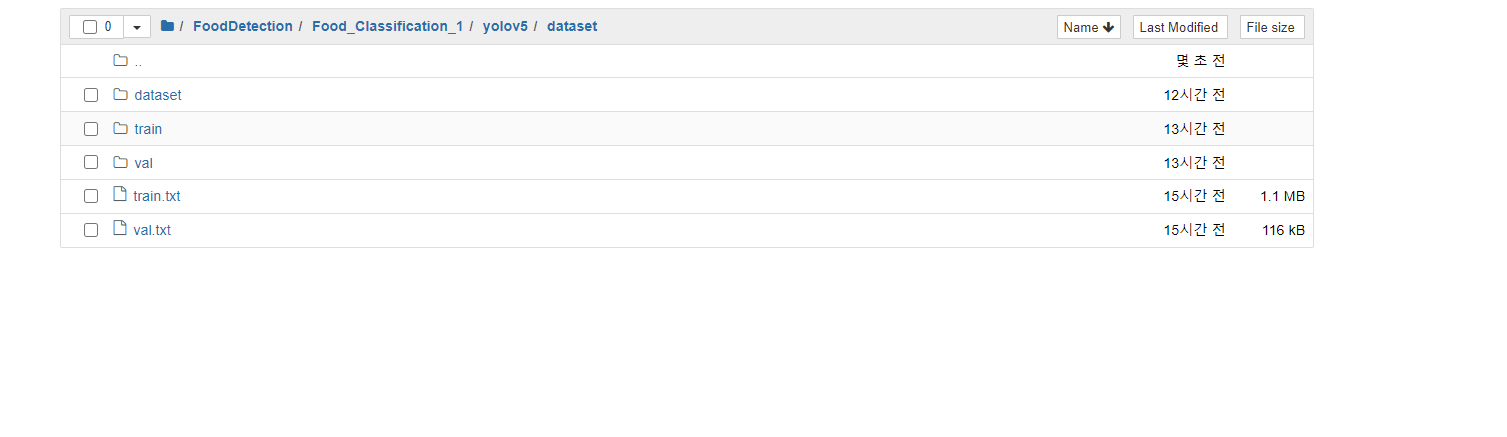
내용을 보면

이런식으로 하위에 생긴다.

이미지 들이 한줄 씩 저장되여 있다.


나눈후 위에 있었든 yaml 파일을 수정

import yaml

with open('/content/yolov5/data.yaml','r') as f:
	data = yaml.load(f)
    
print(data)

json 불러오는 것과 동일하다.


data['train'] = '/content/yolov5/dataset/train.txt'
data['val'] = '/content/yolov5/dataset/val.txt'

with open('/content/dataset/data.yaml' ,'w') as f:
	yaml.dump(data, f)
    
print(data)


%cd /content/yolov5/

!python train.py --img 416 --batch 16 --epochs 50 --data /content/yolov5/data.yaml \
--cfg ./models/yolov5s.yaml --weights yolov5s.pt --name customtest

train.py : trainning 시키는 파일 실행시킨다.

github.com/ultralytics/yolov5 이 경로에서 

github.com/ultralytics/yolov5/wiki/Train-Custom-Data

cfg 는 모델의 구조를 나타난다.

yolov5/models에 정의가 되여있다.

yolov5x.yaml  가장 큰 것

yolov5l.yaml   큰 것

yolov5m.yaml 중간것

yolov5s.yaml   작은것


https://github.com/ultralytics/yolov5/issues/1289


Weights & Biases with YOLOv5 🌟 · Issue #1289 · ultralytics/yolov5

📚 This guide explains how to use Weights & Biases (W&B) with YOLOv5 🚀. UPDATED 25 November 2021. About Weights & Biases First-Time Setup Viewing runs Disabling wandb Advanced Usage: Dat...

github.com

weights: pretrained model 사용 한다.

name : 사용하는 폴더 이름


gpu 사용은 using cuda device

메모리는 15기가 정도 된다.

pretrained 모델 먼저 받은 다음에 training을 시작하게 된다.

image 개서 

targets label 개수 

P  precision

R  RECALL

mAP@.5

mAP@.5:95


training 되는 결과는 runs/아래에 있다.

test batch 하는 것 실시간으로 볼 수 있다.

test_batch0_pred.jpg는 예측된 결과를 보여준다.

test_batch0_gt ground truth 실제 참값이고 

train_batch 도 들어간다.


끝나면 precision , recall ,mAP 정보가 다나오고 

WEIGHT,가 저장 됬다는 것이 나온다.

pytorch 버전


학습 결과 result

텐스 보드 찍어본다.

%load_ext tensorboard
%tensorboad --logdir /content/yolov5/runs/

tensorboard 가 보인다.


정확도 확인

from IPython.display import Image
import os

val_img_path = val_img_list[0]

!python detect.py --weights /content/yolov5/runs/exp0_/weights/best_.pg --img 416 --conf 0.5 --sourch "{val_img_path}"

결과가 /content/yolov5/inference/output


보기가 힘들어서 

val_img_path = val_img_path[2]
Image(os.path.join('/content/yolov5/inference/output', os.path.basename(val_img_path)))

best weight를 다운로드 해서 한다.


동영상이 생성된다.

python detect.py --source ../vedio.mp4 --weights ../best_.py 


format에 따라 바운딩 박스는 (x, y, w, h), x, y, x+w, y+h), (x_center, y_center, w, h) 등으로 표현됩니다. YOLO v5에서는 (x_center, y_center, w, h)의 형식을 따릅니다.


yolov5를 학습할 경우에는 정규화를 해야 한다. 0~1 사이로 

def convert(size, box): # (XM, xmin, xmin, xmin, xmin, xmin, xmin, xmin, xmin, xmin, xmin, xmin, xmin, xmin, xmin, xmin, xmin, xmin, xmin, xmin, xmin, xmin, xmin, xmin, xmin, xmin, xmin
    dw = 1./size[0]     # 1/w
    dh = 1./size[1]     # 1/h
    x = (box[0] + box[1])/2.0   # The x coordinate of the center point of the object in the graph
    y = (box[2] + box[3])/2.0   # The y coordinate of the center point of an object in a graph
    w = box[1] - box[0]         # Actual pixel width of object
    h = box[3] - box[2]         # Actual pixel height of object
    x = x*dw    # The coordinate ratio of the center point x of the object (equivalent to x / original image w)
    w = w*dw    # Width ratio of object width (equivalent to w / original image w)
    y = y*dh    # The coordinate ratio of the center point y of the object (equivalent to Y / original image h)
    h = h*dh    # Width ratio of object width (equivalent to h / original image h)
    return (x, y, w, h)    # Returns the x-coordinate ratio, y-coordinate ratio, width ratio, height ratio of the center point of the object relative to the original image, and the value range [0-1]


# Year = 2012 ', the id (file name) of the corresponding image
def convert_annotation(image_id):
    '''
    The xml File to label Documents, xml The file contains the corresponding bunding Box and picture length, size and other information,
    Through the analysis, and then normalization, finally read label In the document, that is to say
    One image file corresponds to one xml Then, through parsing and normalization, the corresponding information can be saved to a unique one label In the file
    labal Format in file: calss x y w h  At the same time, there are multiple categories corresponding to an image, so the correspondingbundingThere are also multiple messages
    '''
    # Find the corresponding folder through year and open the corresponding image_id, which corresponds to the bund file
    in_file = open('data/Annotations/%s.xml' % (image_id), encoding='utf-8')
    # Prepare the corresponding image_ Write the corresponding label s in ID, which are
    # <object-class> <x> <y> <width> <height>
    out_file = open('data/labels/%s.txt' % (image_id), 'w', encoding='utf-8')
    # Parsing xml file
    tree = ET.parse(in_file)
    # Get the corresponding key value pair
    root = tree.getroot()
    # Get the size of the picture
    size = root.find('size')
    # Get wide
    w = int(size.find('width').text)
    # Get high
    h = int(size.find('height').text)
    # Traverse obj
    for obj in root.iter('object'):
        # Get difficult??
        difficult = obj.find('difficult').text
        # Get category = string type
        cls = obj.find('name').text
        # If the category does not correspond to our scheduled class file, or difficult==1, skip
        if cls not in classes or int(difficult) == 1:
            continue
        # id found by category name
        cls_id = classes.index(cls)
        # Find the bndbox object
        xmlbox = obj.find('bndbox')
        # Get the corresponding array of bndbox = ['xmin','xmax','ymin','ymax']
        b = (float(xmlbox.find('xmin').text), float(xmlbox.find('xmax').text), float(xmlbox.find('ymin').text),
             float(xmlbox.find('ymax').text))
        print(image_id, cls, b)
        # Bring in for normalization operation
        # w = width, h = height, B = array of bndbox = ['xmin','xmax','ymin','ymax']
        bb = convert((w, h), b)
        # bb corresponds to normalized (x,y,w,h)
        # Generate calss x y w h in the label file
        out_file.write(str(cls_id) + " " + " ".join([str(a) for a in bb]) + '\n')

- xmin: x-coordinate of the bottom left part of the image

- xmax: x-coordinate of the top right part of the image

- ymin: y-coordinate of the bottom left part of the image

- ymax: y-coordinate of the top right part of the image


- labels : Encoded cell-type (Yolo - label input-1)

- width : width of that bbox

- height : height of that bbox

- x_center : bbox center (x-axis)

- y_center : bbox center (y-axis)


- x_center_norm : x_center normalized (0-1) (Yolo - label input-2)

- y_center_norm : y_center normalized (0-1) (Yolo - label input-3)

- width_norm : width normalized (0-1) (Yolo - label input-4)

- height_norm : height normalized (0-1) (Yolo - label input-5)

(labels, x_center_norm, y_center_norm, width_norm, height_norm)


towardsai.net/p/computer-vision/yolo-v5-object-detection-on-a-custom-dataset


Yolo-v5 Object Detection on a custom dataset.


towardsai.net


출처 :

www.fatalerrors.org/a/2tp10Q.html


YOLOv5 realizes target detection (train one's own data set to realize cat and cat recognition)

1, Summary On June 10, 2020, Ultralytics officially released YOLOv5 on github. YOLO series can be said to be the front line of power flow in single machine target detection framework. YOLOv5 is not a single model, but a model family, including yolov5s (min

www.fatalerrors.org


www.youtube.com/watch?v=T0DO1C8uYP8


반응형

'Deep learning > 소스' 카테고리의 다른 글

yolov5 coco data set training  (0) 2021.09.17
classification mnist-LeNet-5  (0) 2021.04.03
yolov5 모델pt  (0) 2021.03.26
classification model code  (0) 2021.01.14
python 한국 시간으로 설정  (0) 2020.11.17
반응형

1. visual studio code를 설치한다.


2. git 설치

git-scm.com/download


Git - Downloads

Downloads Mac OS X Windows Linux/Unix Older releases are available and the Git source repository is on GitHub. GUI Clients Git comes with built-in GUI tools (git-gui, gitk), but there are several third-party tools for users looking for a platform-specific

git-scm.com

설치 경로

설치중


3. git 사용

git cmd창에서 

git version확인하기


git config --global user.name username
git config --global user.email user@email.mail

로그인 하는것 들어온다.

하지만 뭔가 설정을 더 해줘야 하는 부분이 있고 여러가지 원인이로 실패하여서 github desktop을 이용하여 연동하였다.

github desktop으로 github 경로에 가서 다운로드 한다음  vs code에서 연동하여 

수정한 파일을 하나하나씩 commit한다음 pushing하여 반영하였다.


반응형

'Deep learning > 환경설정' 카테고리의 다른 글

yolov5 환경 설정하기  (3) 2020.11.23
anaconda kernel생성  (0) 2020.10.28
yolo3 labelImage사용법  (0) 2020.09.26
pytorch 가상환경(anaconda)으로 설치  (0) 2020.08.18
반응형

pip install pyyaml

반응형

+ Recent posts